What Cable Gland Tightening Torque Really Controls
Getting the correct clamping force on an electrical entry point directly determines operational safety. Knowing how tight a cable gland should be prevents environmental ingress and avoids mechanical damage to the cable structure. Cable gland torque controls the transition between loose clearance and an engineered pressure boundary.
What Tightening Torque Means on a Cable Gland
Tightening torque represents the rotational force applied to transform mechanical movement into radial and axial compression. On a modern cable gland, applying precise torque achieves two critical functions:
Radial Seal Compression: Driving the elastomeric insert inward to close all air pathways around the cable jacket.
Mechanical Strain Relief: Engaging internal claws or grip rings to secure the cable against pull-out forces without crushing internal conductors.
Applying the correct cable gland tightening torque ensures an installation maintains its specified ingress protection rating, such as an IP68 cable gland rating, without causing conductor creep or outer sheath rupture.
The Three Interfaces: Cap, Body and Locknut
A secure termination relies on balancing forces across three distinct mechanical contact points:
The Dome Nut (Cap): Compresses the internal cable gland seal onto the cable sheath. Applying torque here controls radial sealing and mechanical retention.
The Gland Body: Seats the entire assembly against the enclosure wall or threaded hub, transferring external mechanical stresses safely away from the conductors.
The Cable Gland Locknut: Clamps the gland body securely across the enclosure wall, compressing the cable gland sealing washer to block moisture from bypassing the chassis hole.
Why No Universal Torque Table Exists for Cable Glands
There is no single universal torque chart for every installation. Required tightening torque varies based on key physical variables:
Gland Construction: A brass cable gland withstands significantly higher torque loads than polyamide or standard plastic variants before thread distortion occurs.
Cable Outer Diameter (OD) Tolerances: A cable near the lower limit of a clamping range demands more thread rotation and displacement to achieve positive seal compression than a cable at the upper limit.
Jacket Hardness and Material: Soft elastomeric jackets (such as silicone or rubber) compress quickly and risk crushing under standard force, whereas rigid polyurethane or PVC jackets require higher torque values to form an effective seal.
Elastomer Compound: Gland seals made of NBR, EPDM, or fluoroelastomers exhibit different durometer ratings, altering the torque required to close the sealing gap.
Proper assembly requires matching the gland material, cable diameter, and manufacturer design parameters rather than relying on a generic tightening figure.
Why Installed Glands Fall Short of Their IP Rating
You can buy a gland rated IP68, mount it to a high-grade junction box, and still find water pooling inside after the first heavy storm or a full wet season. The factory rating states what the component achieved under controlled laboratory conditions, and in most datasheets that figure is measured under static immersion at a stated depth and duration rather than under the pressure pulses of a washdown or a rising water table; it does not guarantee field performance if the assembly mechanics are compromised.
Achieving a genuine ingress barrier comes down to balancing mechanical retention with elastomer physics. The assembly must maintain continuous radial pressure without crushing internal cores. To understand real-world sealing behavior, you must look closely at how waterproof cable glands maintain IP ratings once installed in demanding operational environments.
Over-Tightening: Compression Set and Seal Recovery Loss
The most common installation mistake is cranking down on the cable gland dome nut with excessive leverage. When applying too much torque with an uncalibrated cable gland tightening tool, you destroy the mechanical properties of the internal insert:
Loss of Elastic Recovery: Elastomers rely on elastic memory to push back against the cable jacket. Over tightening forces the material past its yield point, triggering severe compression set.
Jacket Extrusion and Pinching: Excessive radial load bites into soft thermoplastic jackets, pinching inner conductors and creating longitudinal stress fractures along the outer sheath.
Elastomer Splitting: Excessive axial driving forces the insert against the internal gland body shoulder until the seal tears or puckers, creating internal capillary channels for water ingress.
Once an elastomer experiences compression set, it cannot expand back to fill microscopic voids when the cable flexes or settles.
Under-Tightening: Gaps, Ingress and Cable Slip
Under-tightening presents the opposite failure mode. If an installer only turns the cap until it feels snug by hand, the cable gland seal rarely achieves full 360-degree circumferential contact around the jacket circumference:
Inadequate Seal Compression: Without meeting the minimum cable gland tightening torque, tiny gaps remain along cable seams or uneven jacket profiles.
Failed Strain Relief: The clamping claw cannot bite firmly into the jacket, allowing axial cable slip under everyday vibration or routine maintenance pulls.
Terminal Pull-Out: As the cable moves freely through the gland body, dynamic tension transfers directly to sensitive terminal blocks inside the enclosure, leading to short circuits or arc faults.
Thermal Cycling Between -40°C and 100°C: Why Seals Relax
Industrial installations undergo continuous temperature fluctuations. Whether exposed to direct desert sunlight or outdoor sub-zero winter freezes, temperature swings alter the physical dimensions of every component. The standard NBR seal is rated for static service from -40°C to 100°C, with short excursions to 120°C:
Thermal Expansion: Polymers, metals, and cable sheaths expand and contract at completely different rates. At sustained temperatures approaching 100°C, sealing elastomers soften, accelerate their creep rate, and take a permanent set in the compressed shape.
Thermal Shrinkage: When ambient temperatures drop toward -40°C, the cable jacket and seal shrink while simultaneously hardening.
Seal Relaxation: If the initial cable gland torque did not seat the assembly within its optimal elastic band, this cycle leads to permanent torque decay, allowing moisture to breach the enclosure during cold rain cycles.
The Enclosure Side: Knockout Threads, Panel Deflection and Washers
Ingress failures frequently occur at the enclosure interface rather than around the cable jacket. Even if the cap nut is correctly secured, an issue on the mounting wall will compromise the entire system:
Panel Deflection: Torquing a cable gland locknut against thin sheet metal or flexible plastic enclosures causes the wall to bow. This deflection creates an uneven gap beneath the gland flange.
Washer Extrusion: Using an incompatible cable gland sealing washer or over-torquing the body can crush, tear, or extrude the flat gasket straight out of the joint.
Thread Engagement Issues: Punching oversized clearance knockouts strips thread stability. Without sufficient thread engagement between the gland body and locknut, the assembly cannot hold perpendicular alignment under mechanical vibration.
How to Judge a Seal Without a Torque Value
When you are out in the field without a calibrated torque wrench, determining how tight a cable gland should be comes down to mechanical feel and material behavior. You do not always have manufacturer tables on hand, but you still need an airtight, watertight seal that will not strip threads or crush inner conductors. Tightening a gland is about controlled elastomeric deformation, not brute force.
Hand-Tight Plus a Quarter Turn: What That Actually Means
The classic rule of thumb in electrical assembly is “hand-tight plus a quarter to a half turn,” but field technicians often misunderstand what “hand-tight” actually implies:
Finding Zero Point: Thread the dome nut by hand until you feel the internal rubber seal make firm, uniform contact with the outer cable sheath. This is your true zero point, not when the threads simply begin to drag.
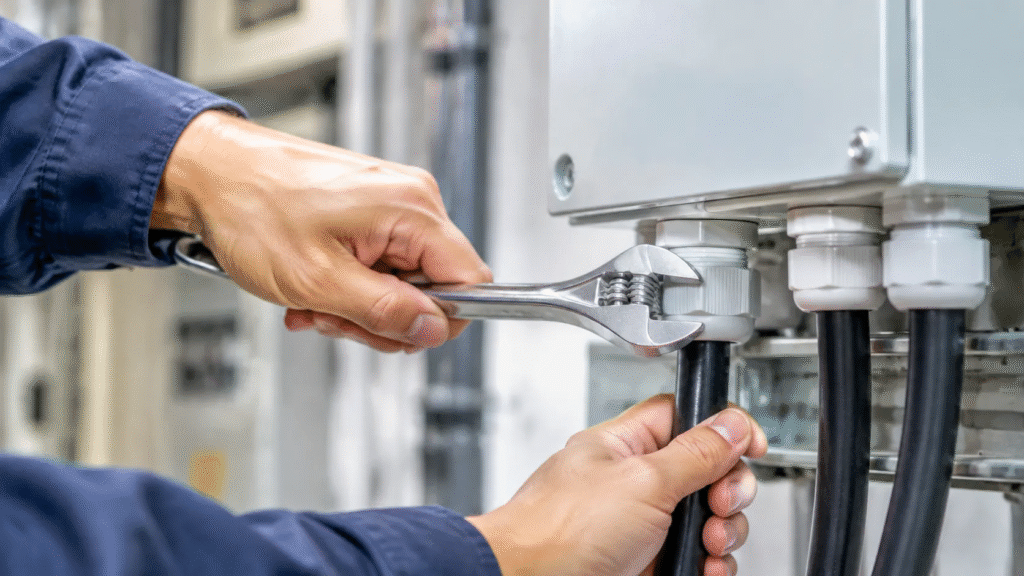
The Mechanical Turn: Engage a proper spanner or cable gland tightening tool on the flats. Rotate the dome nut an additional 90 to 180 degrees (a quarter to half turn).
Claw Engagement: On quality polyamide and brass fittings, this final turn forces the internal clamping fingers inward, generating the radial pressure required for an IP68 cable gland rating without over-stressing the entry threads.
Visual, Tactile and Pull-Test Criteria
You can verify your seal compression using three quick physical checks:
The Visual Check: Inspect the rubber seal where it meets the cable sheath. The elastomer should bulge slightly inward and form an even, smooth ring around the cable jacket. If the seal mushrooms outward irregularly or if the cable jacket wrinkles, you are dealing with severe over-tightening.
The Tactile Check: Run your thumb along the joint where the cable exits the cap nut. The jacket should remain round and firm. If you feel a distinct hourglass waist or a deep necked groove in the jacket, back the nut off immediately.
The Pull Test: Grip the cable firmly about 300 mm (12 inches) away from the enclosure and apply a firm axial pull along with a gentle twist. The cable must not slip, rotate, or pull through the gland body even slightly under routine hand force.
What to Ask a Supplier Before You Order
To avoid field guesswork entirely, collect the essential engineering data from your supplier before ordering in bulk:
Clamping Outer Diameter (OD) Range: Confirm the exact minimum and maximum cable OD tolerance for the specific insert, ensuring your cable does not sit at the absolute extreme edge of the range.
Target Tightening Torque: Request the exact torque specification (in Nm) for both the dome nut and the gland body into the enclosure wall.
Seal Material Compatibility: Ask whether the internal insert is NBR, silicone, or EPDM to ensure it can withstand the chemicals, sunlight, and working temperatures of your operating environment.
Reading the Spec Table: Spanner Size, Thread Engagement and Material
When you check a technical data sheet for a cable gland, the numbers tell a specific story about mechanical limits. Understanding spanner size, thread engagement, and material dynamics prevents field damage and ensures your assembly delivers its full sealing potential.
Two Wrenches, Two Flats: Why Spanner Size Comes in Pairs
Most specification tables list two distinct spanner dimensions because a proper installation requires counter-holding. You cannot secure a gland correctly with a single tool.
Body Spanner Flat: Holds the gland body rigid against the enclosure wall or secures it while torquing the cable gland locknut.
Dome Nut Flat: Drives the cable gland dome nut down to compress the internal sealing insert around the cable jacket.
In the MBCG brass series the pair is printed as a single cell with two figures, and they are not always identical:
Thread
Item No.
Cable Range (mm)
Spanner Size (mm)
M8×1.25
MBCG8-4
2-4
11/11
M16×1.5
MBCG16-8
4-8
18/18
M20×1.5
MBCG20-12
6-12
22/22
M25×1.5
MBCG25-16
12-16
27/27
M32×1.5
MBCG32-22
15-22
35/35
M40×1.5
MBCG40-30
22-30
45/45
M50×1.5
MBCG50-38
32-38
57/55
M63×1.5
MBCG63-44
37-44
64/68
M75×2
MBCG75-52
42-52
78/80
M100×2
MBCG100-84
78-84
110/110
Two patterns are worth reading off this table. The second figure stays constant for any given thread size across every clamping range, which identifies it as the flat that has to be counter-held; the first figure grows with the insert. That is why M25 appears three times in the catalogue at 24/27, 27/27 and 30/27 — same body, three different caps.
The M50 row shows why you cannot assume the order is always descending or that one is always larger. At 57/55 the first figure exceeds the second, while M100 measures 110 across both flats. Confirm the column order with your supplier before ordering, because the convention is written differently from one manufacturer to the next.
Always use two wrenches simultaneously. If you drive the cap nut without securing the body flat with a second open-ended wrench or calibrated cable gland torque wrench, the entire fitting spins. This twists the incoming cable, damages the enclosure paint, and compromises the cable gland sealing washer at the entry point.
Thread Length Against Pitch: How Many Threads Carry the Load
A standard metric or PG thread profile does not distribute mechanical stress evenly across every thread. In practice, the first three or four threads carry most of the axial load once the joint is tightened, which is why engagement matters far more than overall thread length.
Dividing the listed thread length by the pitch gives the number of turns actually available in the same MBCG series:
Thread
Pitch (mm)
Thread Length (mm)
Full Turns
M8×1.25
1.25
5
4.0
M12×1.5
1.5
6.5
4.3
M16×1.5
1.5
8
5.3
M20×1.5
1.5
8
5.3
M25×1.5
1.5
9
6.0
M32×1.5
1.5
10
6.7
M40×1.5
1.5
11
7.3
M50×1.5
1.5
12
8.0
M63×1.5
1.5
13
8.7
M75×2
2
15
7.5
M100×2
2
15
7.5
This table kills a common assumption. Thread length climbs steadily from 5 mm at M8 to 13 mm at M63, and turns climb with it to a peak of 8.7. Then the pitch changes from 1.5 mm to 2 mm on M75 and M100, and despite carrying the longest thread in the range at 15 mm, engagement drops back to 7.5 turns. A longer thread does not automatically mean more load-bearing turns.
If thread engagement is less than three full turns, applying normal tightening force will strip the entry threads before achieving proper seal compression. For high-vibration or heavy-duty enclosures, consulting a detailed cable gland size guide helps confirm that your wall thickness matches the available thread depth.
Brass Body, PA66 Claw and NBR Seal: Which Part Fails First
A multi-material assembly is only as strong as its softest component. In an industrial IP68 cable gland, the structural brass body, polyamide (PA66) clamping claw, and nitrile rubber (NBR) cable gland seal react very differently under load:
The NBR Seal Fails First: When subjected to over tightening, the elastomer exceeds its elastic limit. It suffers severe compression set, extrudes past the gland opening, or splits along the cable jacket, creating instant leak paths.
The PA66 Claw Fails Second: Excessive cable gland tightening torque forces the plastic fingers past their design angle. The fingers buckle unevenly, bite through the cable’s outer jacket, or snap under radial tension.
The Brass Cable Gland Body Fails Last: While a metal body rarely strips under hand tools, over-torquing can still warp the internal seating shoulders, preventing the claw from contracting concentrically.
In the MBCG series the clamp ring sits behind the PA66 claw, so radial force builds progressively over each turn rather than landing on the seal at a single point. That sequencing is what keeps the elastomer inside its elastic band while the claw is still travelling.
Inspection and Re-Tightening Over Service Life
Cable glands are never a fit-and-forget component. Even when you establish how tight a cable gland should be during initial commissioning, real-world factors like mechanical vibration, thermal shifts, and material creep constantly work against that joint. Routine inspection ensures the gland maintains its mechanical grip and ingress barrier throughout its operating life.
What to Check and How Often
Mark the cap flat and the body flat with a paint line before the enclosure is closed, so any relative movement becomes visible at a glance. We recommend an initial check within 24 to 48 hours after installation to catch early relaxation, followed by scheduled audits every 6 to 12 months:
Cap Nut Position: Verify that the cable gland dome nut has not backed off due to equipment vibration. Check the alignment of the cable gland spanner flat against your initial torque marks.
Cable Grip: Perform a gentle manual push-pull check to ensure the cable jacket has not slipped or loosened inside the gland body.
Panel Interface: Inspect the cable gland sealing washer and cable gland locknut at the enclosure wall to confirm the gland body remains firmly seated with zero wobble.
Material Condition: Look for surface cracks on rubber components, UV degradation, oil softening, or corrosion on a brass cable gland installation.
When Re-Tightening Helps and When It Makes Leaks Worse
Re-tightening is only a solution when hardware has backed off mechanically while the elastomer inside is still pliable. If a dome nut has loosened due to light vibration, using a cable gland torque wrench to bring it back to the original cable gland tightening torque restores the seal compression safely.
However, re-tightening will make leaks worse if the cable gland seal has already experienced severe compression set. When an aged, heat-hardened elastomer loses its elasticity, over tightening the cap nut simply crushes the cable jacket and shears the brittle rubber. This creates micro-channels for moisture rather than sealing them. If you notice persistent leakage or jacket necking, follow our step-by-step cable gland installation guide to dismantle, inspect, and reset the assembly rather than continuously forcing more torque onto damaged components.
Replacement Triggers: Seal, Washer and Shroud
When any component passes its service threshold, full replacement is the only way to preserve the IP68 rating. Replace the assembly immediately if you encounter any of these triggers:
The Cable Gland Seal: Shows permanent indentation, splits, tearing along the clamping claws, or extrusion out of the gland neck.
The Sealing Washer: Exhibits permanent thinning, extrusion past the entry thread shoulder, or cracking around the knockout hole.
The Protective Shroud: Becomes brittle, discolored from sunlight exposure, torn, or begins trapping moisture against the entry threads.
The Thread Interface: Displays galling, stripped entry threads, or warped claws that fail to contract evenly around the cable.
Frequently Asked Questions
How tight should a cable gland be without a torque wrench?
Run the dome nut down by hand until the internal seal makes firm, even contact with the jacket, then add a quarter to a half turn with a spanner on the flats. Treat this as a field fallback rather than a specification: it assumes a sound thread and a pliable insert, and it gives no protection against an enclosure wall that flexes under load.
Why do IP68 cable glands leak after installation?
In most cases the gland itself has not failed. The breach comes from one of four places: an insert compressed past its elastic limit so it cannot recover, insufficient engagement leaving a capillary path along the jacket, differential expansion between brass, PA66 and NBR over thermal cycles, or a sealing washer crushed against a knockout that was punched oversize.
What happens if you over-tighten a cable gland?
The elastomer reaches compression set first and stops pushing back against the jacket, which removes the radial pressure that was holding the seal closed. The PA66 claw then buckles past its design angle and may bite through the sheath. The brass body usually survives, but the seating shoulder can warp enough to stop the claw contracting concentrically, and the gland is scrap from that point on.
Does a bigger spanner size mean a higher torque?
No. Spanner size is a length in millimetres, not a rotation force. A larger flat allows a longer wrench and therefore a longer lever arm, so the same hand force produces more torque — which is precisely why field feel becomes less reliable as gland size increases. The actual torque figure has to come from the supplier, and it cannot be transferred between manufacturers.
About Wandu — Zhejiang Wandu Plastic Co., Ltd. has produced nylon cable ties in Yueqing, Zhejiang, China since 2011. Our ISO 9001 certified factory runs 10 high-speed injection moulding machines and 8 professional cable tie test benches, covering nylon cable ties, stainless steel cable ties, cable clips, cable glands and spiral wrap. Products are CE and RoHS compliant and ship to buyers in 50+ countries. Every technical question below is answered by our own engineering team.
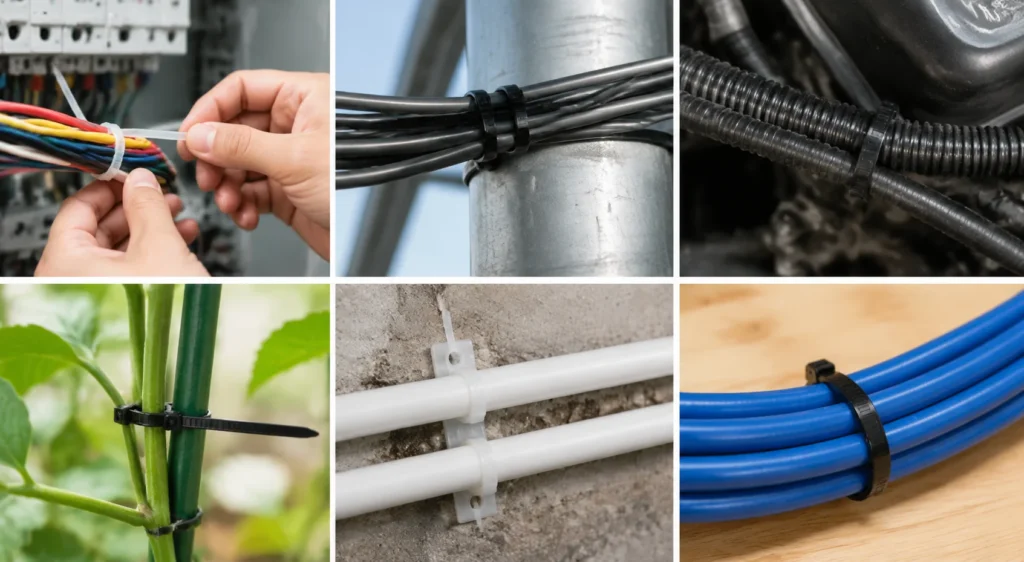
Ever wondered how to streamline your vehicle’s wiring system?Car zip ties offer an efficient solution for optimizing automotive wiring harness and component fixation.These versatile fasteners provide strength, durability, and ease of use, making them ideal for organizing and securing electrical components in vehicles.In this post, we’ll explore practical techniques to leverage nylon cable ties for […]
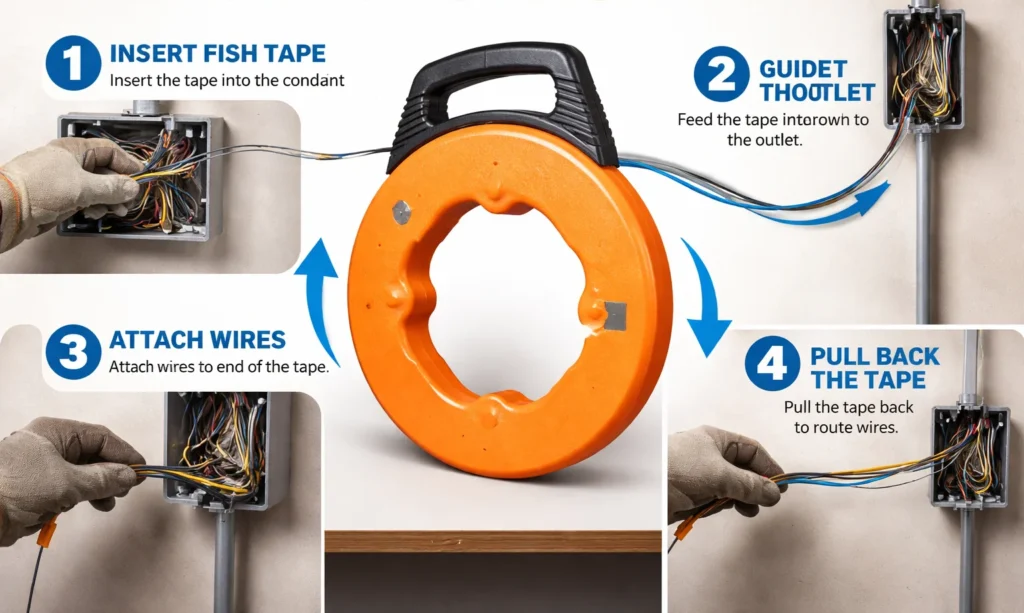
Ultimate Guide: How to Use Fish Tape for Industrial Wiring What is a Fish Tape? A fish tape is an essential electrician’s tool used to route new wiring through walls, electrical conduit, and tight spaces. Understanding how to use fish tape properly ensures safe electrical connections and stable conductivity in industrial and commercial projects. How […]
What is a Cable Tie? Understanding the Anatomy Whether you call them zip ties, wire ties, or hose fasteners, cable ties are the unsung heroes of modern organization. Used globally across automotive, industrial, and residential sectors, these simple fasteners provide incredibly secure binding with minimal effort. As a premier wiring accessories manufacturer and supplier, WANDU […]
We use cookies to enhance your browsing experience, serve personalised ads or content, and analyse our traffic. By clicking "Accept All", you consent to our use of cookies.
Looking For High Quality Nylon Cable Ties At A Great Price?
Order now to experience cost-effective cable tie products that provide convenience and protection for your work and life.


 EN
 AR
 ES
 PT
 FR
 RU
 DE
 KO
 JA
 IT
 NL
 TR