Selecting the proper twist-on wire connector starts with matching your conductor sizes to an accurate wire nut size chart. Wandu manufactures twist-on connectors and closed-end crimp terminals for residential, commercial and industrial wiring. Using the right connector size ensures firm mechanical retention and prevents loose splices.
The table below lists every model in the current range. Dimensions are the shell as moulded, not the wire bundle inside it.
Standard Wire Nut Sizes by Model
Twist-on wire connectors are grouped by shell volume and internal spring capacity. Each model accepts a defined range of solid or stranded copper conductors, and each maintains contact pressure across that range rather than at a single gauge. The five models below share the same 105 °C (221 °F) temperature rating and the same copper-only construction.
Model
Color
ID × OD × Length (mm)
Wire Range (AWG)
Voltage Max.
Carton Qty
P1
Gray
6.5 × 8.6 × 15.2
22 – 14
300 V
20,000
P2
Orange
7.1 × 9.9 × 17.7
22 – 14
300 V
10,000
P3
Light Orange
9.7 × 12.7 × 22.0
22 – 14
300 / 600 V
5,000
P4
Orange
11.0 × 14.0 × 24.6
22 – 8
300 / 600 V
5,000
P6
Red
13.1 × 16.3 × 26.5
22 – 10
300 / 600 V
5,000
Two models share the same shell colour but not the same capacity: P2 and P4 are both orange, yet P2 stops at 14 AWG and P4 reaches 8 AWG. Selecting by colour alone will put a 10 AWG splice into a connector rated only to 14 AWG.
Wire Range and Maximum Conductor Combinations
Every wire nut size guide defines two limits: the minimum wire combination required for the internal spring to bite securely, and the maximum wire combination the shell can house without overfilling. Both are combination ratings, not single-wire ratings — three 16 AWG conductors and one 16 AWG conductor are different questions.
Model
Min. Combination
Max. Combination
P1
2 × 22
1 × 16 + 1 × 18 + 1 × 20
P2
2 × 22
3 × 16
P3
1 × 18 + 1 × 20
4 × 16 + 1 × 20
P4
3 × 20 solid
2 × 12 + 2 × 14
P6
3 × 18
2 × 10 solid + 2 × 12 stranded
Minimum capacity: Twisting too few or overly thin wires inside a large connector results in a loose mechanical grip and poor electrical continuity.
Maximum capacity: Exceeding the rated conductor count prevents the insulating skirt from covering exposed copper and stresses the internal spring.
Mixed-gauge splices: When joining different wire sizes — such as connecting a 14 AWG fixture lead to a 12 AWG branch wire — verify that the exact combination appears in the table above, not just that each individual wire falls inside the range.
Why Color Is a Brand Convention, Not a Standard
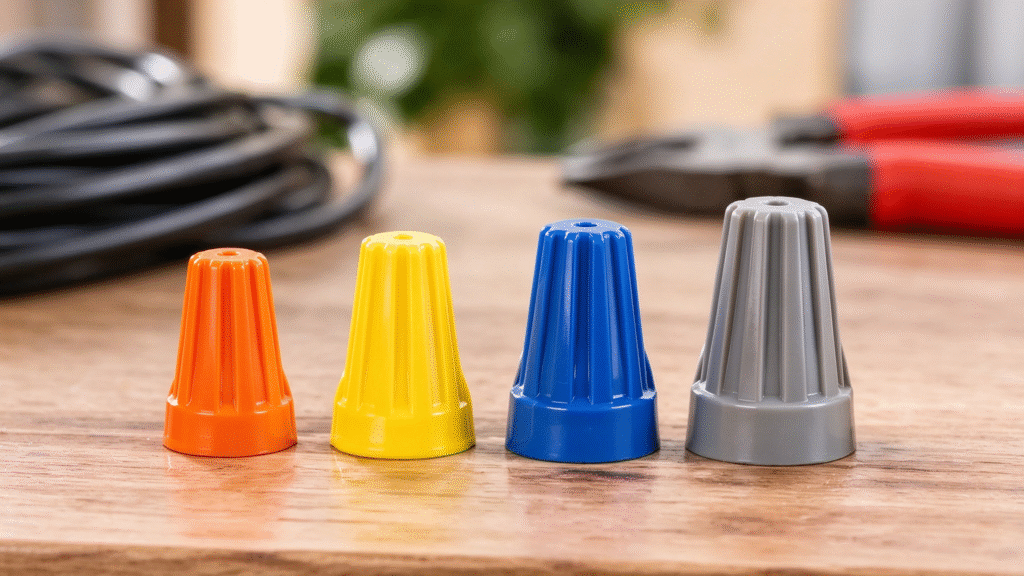
While the wire nut color chart above reflects how this range is organised, colour coding is not governed by a universal international standard. Different manufacturers assign colours to their own internal spring dimensions and shell volumes, so an orange connector from one brand is not interchangeable with an orange connector from another.
Check technical specifications: Never rely solely on shell colour when sourcing connectors for industrial panels or large-scale electrical installations.
Verify rated combinations: Confirm the exact AWG minimum and maximum ratings specified for the specific model series you are installing.
Standardize your supply: Sourcing consistent batches from a single wiring accessories manufacturer eliminates sizing discrepancies across job sites and production lines.
How the Internal Spring Grips a Splice
A twist-on wire connector looks simple from the outside, yet its reliability comes down to what happens inside the shell. The shell insulates; the spring does the electrical and mechanical work.
Core Design and Spring Mechanics
Inside every twist-on wire connector sits a tapered, square-wire metal coil spring housed within a thermoplastic shell. As you twist the cap clockwise onto stripped conductors, that tapered spring acts like a self-threading vice.
Mechanical clamping: The narrowing coils bite lightly into the outer surface of the copper conductors, pulling the wires tightly together so they cannot slip or vibrate loose.
Stable conductivity: Constant radial spring tension maximises surface-to-surface contact between the wires, keeping electrical resistance low and preventing hot spots.
Insulating skirt: The outer plastic shell shields the exposed splice from accidental contact and short circuits inside junction boxes or control panels.
Matching the conductor bundle to the right model in the size chart ensures the spring expands just enough to grip firmly without over-stressing the coils or leaving loose strands behind.
Voltage, Temperature and Flame Ratings
The shell and internal assembly carry their own ratings, and each one answers a different question.
Voltage rating: P1 and P2 are rated 300 V maximum. P3, P4 and P6 are dual-rated 300 V / 600 V. Verify the stamped or packaged rating before energising a circuit at 600 V.
Temperature tolerance: The full range is rated to 105 °C (221 °F) continuous. Thermoplastic shells soften and crack above their rating, so a splice inside a fixture housing or near a heat source must be checked against that number, not against the ambient room temperature.
Flame retardancy: Housings are UL94 V-2 rated and self-extinguishing, so a fault inside the connector does not sustain a flame.
Approvals: All five models are UL listed, CSA certified and CCC marked, and rated for copper conductors only.
One rating you will not find on a connector datasheet is ampacity. Current-carrying capacity belongs to the conductor, not to the splice: a 14 AWG copper wire is limited by its insulation temperature rating and the overcurrent device protecting the circuit, regardless of which connector is twisted onto it. A connector is selected by wire range, voltage and temperature, and its job is to preserve the conductivity of the conductors it joins. Sizing a splice by amps is the wrong axis, and a connector marketed on an amp rating alone is answering a question that belongs elsewhere.
Choosing the right connector goes beyond checking a basic size chart. Different wiring jobs call for distinct housing designs and fastening methods, and the range here is built around two of them.
Standard Twist-On Connectors
A standard twist-on connector relies on a fluted plastic shell that gives you enough grip for routine hand-twisting inside junction boxes and control panels. P1 through P6 all follow this pattern, differing only in shell diameter, spring taper and rated combination.
Small shells (P1, P2): Best for tight enclosures where compact outer dimensions matter most, and for control and signal wiring at the thin end of the range.
Large shells (P3, P4, P6): Built for multi-conductor bundles and heavier gauges where the spring has to reach across thicker copper.
Winged variants: Some manufacturers mould side wings onto the shell for extra leverage during repetitive splicing. That ergonomic form is a market variant, and this range does not include it — for high-volume repetitive work, match the job to the correct combination rating first, since leverage does not extend a connector’s capacity.
Closed-End Crimp Connectors
Unlike twist-on connectors that rely on a threaded internal spring, closed-end crimp connectors use a metal insert encased in an insulated nylon sleeve. You insert the stripped wires into the open end and compress the barrel with a dedicated crimping tool. The translucent shell lets you confirm the conductors are fully seated before crimping.
Series
Wire Range (AWG)
Common Application
CE1 / CE1X
22 – 18
Low-voltage electronics, lighting
CE2 / CE2X
16 – 14
General automotive, household wiring
CE5 / CE5X
12 – 10
Heavy-duty appliances, industrial
CE8
8
High-current power lines
Permanent mechanical hold: Crimping physically deforms the sleeve onto the conductors, preventing loosening under heavy machine vibration.
Compact footprint: Slim cylindrical bodies fit easily into crowded equipment housings and appliance harnesses.
What Our Range Does Not Cover: Waterproof, High-Temperature and Al/Cu
To help you specify the exact hardware your project demands, it helps to know where the catalogue stops. While we produce specialised material formulations in our cable tie lines — including heat-resistant and outdoor-rated options covered in our guide to cable tie temperature limits — the wire connector lineup focuses strictly on standard dry-location copper wiring.
Waterproof gel-filled connectors: Standard connectors are not sealed for direct burial, wet locations or submerged outdoor splices.
High-temperature ceramic connectors: No porcelain or high-heat connectors are supplied for ovens, furnaces or industrial heating elements.
Aluminum-to-copper (Al/Cu) connectors: All five models are rated for copper conductors only and are not rated for joining aluminum branch wiring.
How to Select the Right Wire Nut
Choosing the correct twist-on connector comes down to three practical checks before you twist anything together. Wandu supplies wire connectors and wire terminals directly from the factory, so the model number and the pack quantity can be matched to the job rather than to a shelf.
Determining Wire Gauge and Conductor Count
Start by checking the exact American Wire Gauge (AWG) and total number of wires entering the splice. Every chart of this kind defines a minimum and maximum combination, and both matter.
Check wire insulation markings: Read the printed AWG size on each conductor jacket rather than guessing by thickness.
Count every conductor: Include all hot, neutral or ground wires joining in that single splice, including any pigtail leads.
Stay inside the rated range: Putting too few wires into a large connector leaves the splice loose, while forcing too many wires into a small cap prevents the spring from biting properly.
Accounting for Solid vs. Stranded Wire
Solid and stranded conductors behave differently inside a twist on wire connector, so how you prepare them matters as much as the model you pick.
Solid wire: Holds its shape under pressure, letting the internal spring cut slightly into the copper for a rigid mechanical hold.
Stranded wire: Compresses and spreads out easily. When joining stranded to solid wire, strip the stranded wire slightly longer so it wraps cleanly around the solid core as you tighten the nut.
Mixed-gauge splices: Match the total combination against the table above so thinner stranded leads do not slip out of the bundle.
The two behaviours meet in one common case: a wire nut for 12 gauge wire joining a 12 AWG solid branch conductor to a 14 AWG stranded fixture lead. That combination is inside the rated range of P4 but outside P2, and the difference is the shell, not the colour.
Evaluating Environmental and Application Needs
Once the wire count is set, match the connector to the surrounding conditions and workload.
Standard indoor enclosures: General-purpose insulated connectors work reliably inside dry electrical boxes, lighting fixtures and control panels.
Heavy industrial and high-vibration setups: Look for tight-gripping connectors paired with proper strain relief and cable management so constant machine movement cannot back the splice loose over time.
Quality and compliance: Confirm the model is UL listed, CSA certified and rated for the voltage of the circuit it protects — not simply that it fits the wire.
Common Electrical Applications by Fixture and Gauge
Matching the right connector to your circuit starts with knowing the wire gauge and current load of the fixture you are wiring. A properly sized twist on wire connector keeps the splice stable across residential, commercial and industrial work.
Residential Lighting and Ceiling Fans (22–14 AWG)
Light fixtures, sconces and ceiling fans typically pair smaller 18–16 AWG stranded fixture leads with 14 AWG solid branch circuit wires.
Typical connector: P1 or P2, both rated 22–14 AWG. A single orange wire nut from another brand may not cover the same range, so check the model rather than the colour.
What to watch:
Verify the combination rating when joining thin stranded fixture leads to thicker solid house wiring.
When bundling multiple fixture leads inside a canopy or junction box, organise excess slack with durable nylon cable ties to keep the enclosure neat and prevent strain on the splice.
Outlets, Switches, and General Circuits (14–12 AWG)
Standard 15 A and 20 A branch circuits powering wall receptacles, dimmer switches and room lighting use 14 AWG or 12 AWG copper conductors.
Typical connector: P3 for two or three 14 AWG conductors, P4 for multiple 12 AWG conductors — the red wire nut P6 is also rated to 10 AWG solid and suits four-conductor bundles.
What to watch:
Joining three or four 12 AWG solid wires requires enough internal spring capacity to grip every conductor tightly without splitting the shell.
Check the combination table before pigtailing outlets, so oversized bundles never go into an undersized cap.
Heavy Appliances and High-Load Circuits (12–8 AWG)
High-draw equipment — electric water heaters, HVAC units, dryers and industrial control panels — relies on heavier 10 AWG and 8 AWG wiring to handle sustained current safely.
Typical connector: P4, rated 22–8 AWG and 300/600 V, is the model for 10 and 8 AWG combinations. A wire nut for 10 gauge wire must also be checked against the conductor count, since four 10 AWG conductors exceed the shell even at the right gauge.
What to watch:
Confirm the voltage and temperature rating matches the equipment load, not only the wire size.
For heavy industrial runs entering junction boxes or panels, pair properly sized connectors with a secure cable gland installation to protect the termination from mechanical pull and vibration.
Circuit Category
Common Wire Gauges
Typical Applications
Selection Priority
Low-Load Fixtures
22–14 AWG
Ceiling fans, chandeliers, recessed lights
Gripping mixed solid and stranded leads
General Branch Circuits
14–12 AWG
Wall outlets, light switches, GFCI receptacles
Accommodating 2 to 4 solid conductors
High-Load Equipment
12–8 AWG
Water heaters, HVAC systems, industrial panels
High current capacity and secure spring tension
Wire Nuts vs. Alternative Connectors
Choosing the right splicing method comes down to space, vibration levels and how often a circuit needs servicing. While a twist-on connector handles most everyday junctions, other styles solve specific installation problems.
Wire Nuts vs. Push-In and Lever Connectors
The most common comparison for a twist-on connector is against lever-actuated connectors sold under brand names such as Wago, and against simple push-in blocks. All three do the same job with different mechanics.
Cost and bulk value: Twist-on connectors cost a fraction per splice compared to push-in or lever-style connectors, making them the default choice for large-scale installations and bulk projects.
Connection mechanics: A twist-on connector uses an internal threaded spring to twist conductors together mechanically, while push-in and lever connectors rely on internal spring-loaded clamps that grip each conductor separately.
Reusability and speed: Lever connectors open and close without tools, which speeds up troubleshooting or frequent circuit changes. Push-in connectors install quickly on solid wire but can be difficult to release without damaging the conductor.
Box space: Lever and push-in blocks have a flat, rectangular footprint that sits neatly in tight junction boxes, whereas larger twist-on caps take up more radial room.
Mixed gauges: Lever connectors are usually rated per single wire size, while a twist-on connector is rated for a combination — which is why a mixed solid-and-stranded splice often goes back to a twist-on cap.
Wire Nuts vs. Crimp Connectors and Terminal Blocks
Feature
Twist-On Connectors
Crimp Connectors & Wire Terminals
Terminal Blocks
Best Use Case
Junction boxes, lighting, and general branch wiring
High-vibration equipment, automotive, and panel harnesses
Control panels, DIN-rail layouts, and structured distribution
Tools Required
None (hand-twisted)
Dedicated crimping tool
Screwdriver or spring-release tool
Serviceability
Reusable if undamaged; simply untwist
Permanent; must be cut off to replace
High; individual wires can be disconnected cleanly
Conductivity & Hold
Strong mechanical twist for static wiring
Gas-tight compression seal resists vibration
Rigid screw or clamp pressure for organized runs
For permanent, high-vibration splices or organised control panels, pairing industrial wire connectors and wire terminals with proper routing keeps conductivity stable and maintenance straightforward.
Installation Best Practices and Common Mistakes
Picking the right model from the size chart is only half the job — how you install the connector determines whether the splice stays safe over time. Proper technique is what lets the internal spring do its job without overheating or loosening.
Step-by-Step Guide to a Secure Wire Nut Connection
Follow these steps every time you make a twist-on connection:
Shut off the power: Turn off the circuit at the breaker and verify with a voltage tester before touching any conductors.
Match the connector to your wires: Check the gauges and conductor count against the combination table so the connector sits squarely within its rated range.
Strip the insulation cleanly: Remove only the length of insulation specified for that connector size. Nicking the copper weakens the wire and reduces conductivity.
Align the bare ends: Hold the stripped ends parallel and even. If you are joining stranded wire with solid wire, let the stranded conductor extend slightly past the solid one so the spring catches both evenly.
Twist clockwise until tight: Push the wires firmly into the connector and turn clockwise until you feel solid resistance and see a couple of twists form in the insulated wires just below the skirt.
Perform a tug test: Hold the connector body and pull gently on each individual wire. No conductor should slip or shift inside the cap.
Critical Mistakes to Avoid and When to Replace Connectors
Even experienced installers run into trouble when they rush a splice. Watch for these errors:
Leaving bare copper exposed: Stripping too much insulation leaves live copper hanging below the skirt, creating an immediate short-circuit hazard inside a crowded junction box.
Overfilling or underfilling the cap: Stuffing too many conductors into a small connector prevents the spring from threading properly, while using an oversized connector leaves the wires loose and prone to arcing.
Mixing incompatible metals without rated connectors: Standard twist-on connectors are built for copper-to-copper splices. Never join aluminum and copper conductors with a standard cap.
Reusing worn or damaged connectors: If the outer shell is cracked, heat-discoloured, or the internal spring feels stretched after removal, discard it and install a fresh connector.
Once your splices are tested and tucked safely inside the box, neat cable management keeps strain off the connections. If you are routing wiring in harsh or chemical-heavy environments, our polypropylene cable ties guide breaks down how to secure wire bundles without damaging the jacket.
Packaging and Ordering Quantities
How Minimum Pack Sizes Affect Job Cost
When planning an installation or stocking up for commercial maintenance, matching project volume to the right packaging tier keeps the material budget under control. Buying small retail bags for large-scale panel builds or multi-unit wiring runs drives up per-unit spend, while ordering wire nuts bulk quantities lowers cost per splice.
Carton quantities in this range run from 5,000 pieces (P3, P4, P6) through 10,000 (P2) to 20,000 (P1), packed in 500- or 1,000-piece bags. That structure is built for contractors and distributors rather than for retail pegs, which changes how a job should be costed:
Small-batch repairs and service calls: Draw from a single opened bag rather than ordering a retail assortment, so leftover inventory does not sit unused in a toolbox.
Commercial and industrial wiring runs: Bulk cartons reduce unit cost and keep crews supplied with consistent connectors across large installations, with one model number rather than mixed retail packs.
Mixed-model orders: Because panel work usually needs two or three sizes, ask for a carton split across P2, P3 and P4 rather than standardising on one size and forcing it outside its rated combination.
Wandu supplies connectors directly as a B2B manufacturer rather than listing fixed retail pack prices, so quantities can be matched to the job and a quote requested against the actual model mix.
If you are organising complete wiring runs alongside your splices, pairing the connector order with bundled accessories — such as checking standard zip tie sizes and strength ratings for cable management — streamlines procurement into a single shipment.
Frequently Asked Questions
How many wires can one wire nut hold?
The answer depends on the model and on the gauges being joined, because capacity is a combination rating rather than a wire count. Across this range the maximum is five conductors (P3, at 4 × 16 AWG plus 1 × 20 AWG) and the minimum is two conductors on P1 and P2.
Minimum count: Most connectors require at least two conductors so the internal spring can bite and lock them together.
Maximum count: Four 14 AWG wires and four 12 AWG wires occupy very different volume, so check the specific combination rather than counting wires.
Should you pre-twist wires before using a wire nut?
Modern twist-on connectors are engineered so the internal square-wire spring twists the conductors together as you tighten the shell, so pre-twisting is not required by the connector design. Many electricians still pre-twist with linesman pliers when joining three or more solid conductors, or when mixing solid and stranded wire, because it makes the final twist easier to verify.
If you pre-twist: Keep the stripped ends flush and neat before threading the connector on until you see a couple of twists in the insulation outside the skirt.
If you do not pre-twist: Hold the stripped ends evenly together, or let stranded wire sit slightly proud of solid wire, and twist the connector firmly until it passes a gentle tug test on every individual wire.
Should you wrap electrical tape around wire nuts?
For standard indoor junction boxes and control panels, electrical tape is unnecessary if you select the right connector size and strip the wire to the proper length. A properly sized connector fully covers all bare copper inside its insulated shell.
When tape causes problems: Wrapping tape over a loose splice hides a mechanical failure rather than fixing it, and adhesive residue makes future maintenance messy.
When extra securing helps: In high-vibration environments or tight enclosures, securing the bundled leads just behind the splice with accessories such as cable ties used in the construction industry relieves physical strain on the connection without gumming up the connector itself.
What happens if you use the wrong wire nut size?
Picking the wrong size directly compromises connection safety and electrical conductivity:
Too large: The internal spring cannot apply enough compression to grip the copper tightly. Wires can pull loose during installation or vibrate free over time, leading to high resistance, arcing and overheating.
Too small: You risk nicking or shearing off fine strands when forcing the connector on, or leaving bare copper exposed past the bottom of the skirt, creating a short-circuit or shock hazard.
Can wire nuts be used on aluminum wire?
Copper-rated twist-on connectors cannot be used on solid aluminum wiring or for joining aluminum to copper. Mixing aluminum and copper inside a standard steel-spring connector leads to galvanic corrosion, thermal expansion mismatch and severe overheating. All five models in this range are rated for copper conductors only.
What to do instead: If you are working with aluminum conductors, use only connectors specifically tested and listed for Al/Cu (aluminum-to-copper) applications with an appropriate antioxidant compound.
About Wandu — Zhejiang Wandu Plastic Co., Ltd. has produced nylon cable ties in Yueqing, Zhejiang, China since 2011. Our ISO 9001 certified factory runs 10 high-speed injection moulding machines and 8 professional cable tie test benches, covering nylon cable ties, stainless steel cable ties, cable clips, cable glands and spiral wrap. Products are CE and RoHS compliant and ship to buyers in 50+ countries. Every technical question below is answered by our own engineering team.
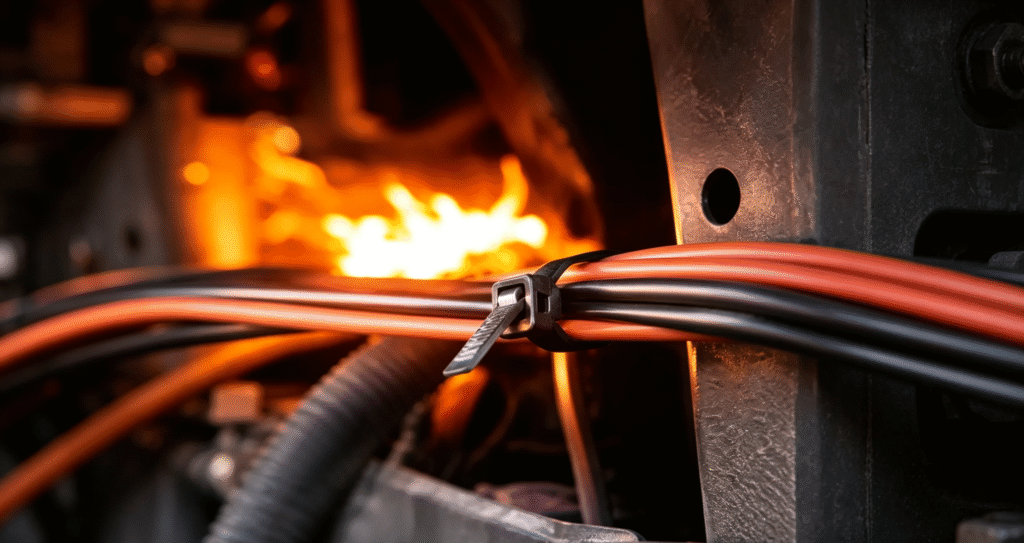
At What Temperature Do Zip Ties Melt? Standard polymer zip ties begin to melt at 255°C (491°F), while high-performance metallic ties can withstand extreme thermal environments up to 1370°C (2498°F). However, physical melting is the ultimate point of complete destruction. Structural degradation, loss of tensile strength, and locking failure occur long before a tie reaches […]
What Are Metal Cable Ties and How Do They Work? Metal zip ties are the ultimate fastening solution for demanding industrial and outdoor environments. Built to withstand extreme temperatures, harsh chemicals, and heavy loads, these durable fasteners provide permanent, reliable bundling where traditional plastic alternatives simply fail. Understanding how to use metal cable ties effectively […]
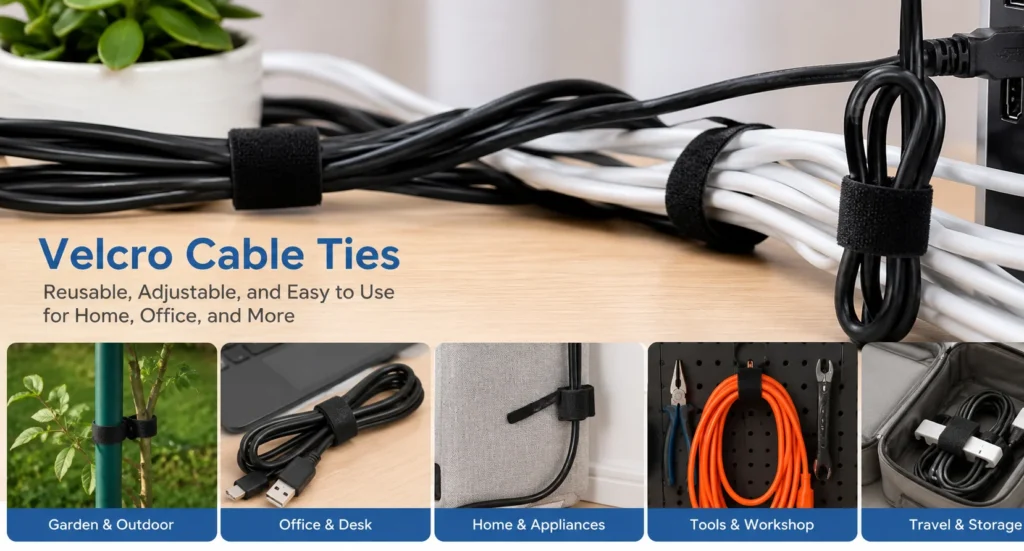
Understanding Velcro Cable Ties and Hook-and-Loop Fasteners What Are Velcro Cable Ties? Velcro cable ties are reusable fastening solutions designed to bundle, organize, and secure wires and cables. Made from durable nylon or polyester fabric, these ties feature a two-sided mechanism that grips itself without the need for adhesive. They are widely used across global […]
We use cookies to enhance your browsing experience, serve personalised ads or content, and analyse our traffic. By clicking "Accept All", you consent to our use of cookies.
Looking For High Quality Nylon Cable Ties At A Great Price?
Order now to experience cost-effective cable tie products that provide convenience and protection for your work and life.


 EN
 AR
 ES
 PT
 FR
 RU
 DE
 KO
 JA
 IT
 NL
 TR