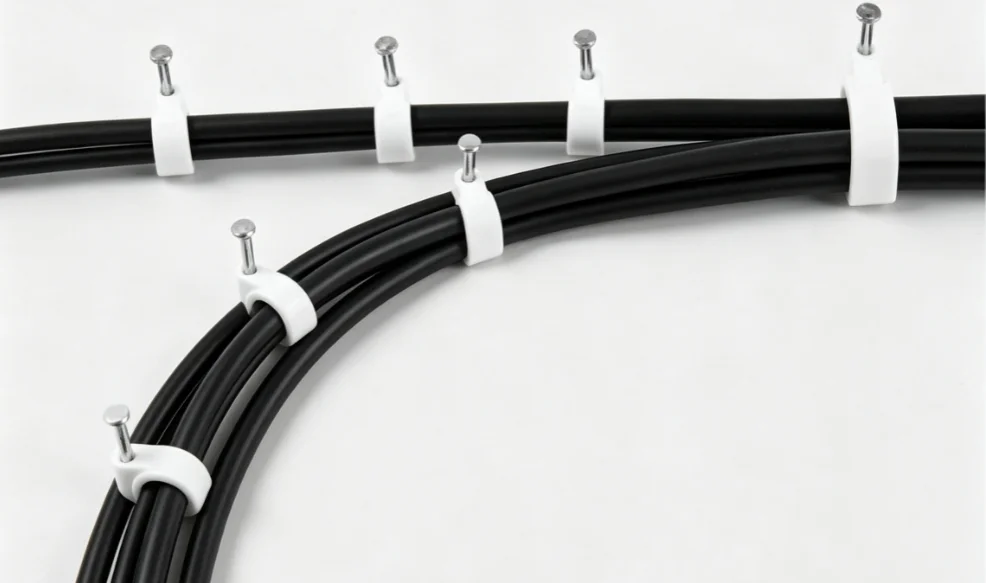
Cable clips with nails are simple, highly effective fasteners used to anchor electrical, data, or entertainment cables to walls, baseboards, and framing. Featuring a molded hook or collar integrated with a heavy-duty steel pin, these nail in cable clips allow for clean wire routing. Their primary function is to eliminate tripping hazards, prevent cable strain, and maintain an organized, professional appearance in both residential and commercial setups.
Key Advantages of Nail-In Cable Clips
Using premium nail-in cable clips offers distinct structural and aesthetic benefits:
Rapid Installation: Securing a wire takes only seconds with a standard hammer.
Cost-Effective Efficiency: As a top manufacturer, WANDU provides these high-density wiring accessories as a low-cost, high-yield solution for large-scale projects.
Minimal Surface Damage: Unlike bulky brackets, a cable nail clip leaves only a microscopic pinhole if removed.
Versatile Low-Profile Design: They hug the mounting surface tightly, keeping cables tucked safely out of sight.
Choosing the right composition ensures long-term durability and safety:
Material Type
Core Features
Best Used For
High-Grade Plastic (PP/PE)
Flexible, UV-resistant, non-conductive, and impact-resistant. Available as white cable clips or black plastic cable clips.
Indoor residential wiring, telecom installations, and general data routing.
Heavy-Duty Metal
Rigid, fireproof, and virtually indestructible under extreme physical stress.
Industrial environments, high-temperature zones, and heavy armored cables.
How to Choose the Right Size and Variant
Measuring Cable Diameters and Clip Sizes
Choosing the right cable clips with nails starts with getting an accurate measurement of your cable. If the clip is too small, it will pinch and damage the inner wires; if it is too large, the cable will slip and sag. Use a digital caliper or a simple ruler to measure the total diameter of your cable.
Cable Type
Average Diameter
Recommended Clip Size
Cat6 Ethernet
6mm – 7mm
7mm round cable clip
RG6 Coaxial
7mm – 8mm
8mm cable clips black or white
Heavy-Duty Power
10mm+
10mm or 12mm round cable clips
Selecting Colors and Profiles (Round vs. Flat)
Matching the clip profile and color to your specific environment ensures a clean, professional finish.
Round Cable Clips: Best for standard ethernet, coaxial, and rounded power cords.
Flat Cable Clips: Designed specifically for flat twin-and-earth wiring or low-profile data cables.
Color Selection: Use white cable clips for standard baseboards and residential drywall. Opt for black plastic cable clips when running lines along dark surfaces, outdoor brickwork, or theater setups to keep the installation hidden.
Choosing the Right Nail Length for Different Surfaces
The nail attached to your nail-in cable clips must suit the mounting surface to provide a lasting hold without splitting the material.
Wood and Skirting Boards: Short to medium nails work best. They grip tightly into timber without the risk of piercing hidden pipes behind the board.
Masonry and Mortar: Hardened steel masonry nails are required. Ensure the nail length allows for at least 15mm to 20mm of penetration into the mortar joint for a secure anchor.
Drywall: Standard nails can pull out easily over time. For high-traffic areas, pair your nail on cable clips with small wall plugs, or manage your bundle bundles tightly by organizing structural runs using specialized management tools. While managing bulk commercial setups often requires heavy-duty solutions like structural fasteners, you can learn how to evaluate the durability and cost-effectiveness of nylon cable ties from specialized manufacturers like WANDU to complement your overall wiring strategy.
Tools and Materials Needed for Installation
Getting your cables organized requires the right gear. Having these items on hand ensures a quick, clean, and secure setup when working with cable clips with nails.
Essential Hand Tools
You don’t need a massive toolbox for this project, but a few precise tools will make a huge difference in the final look:
Claw Hammer: A lightweight hammer (around 8oz to 12oz) gives you the best control when driving small nails without damaging the plastic clip.
Tape Measure and Pencil: Crucial for mapping out straight lines and consistent spacing.
Spirit Level / Laser Level: Keeps your long cable runs perfectly horizontal or vertical along walls and baseboards.
Wire Cutters / Strippers: For trimming any excess ties or managing cable slack.
Needle-Nose Pliers: Highly recommended for holding small cable nail clips in place, keeping your fingers safe from accidental hammer strikes.
Safety Equipment and Wall Anchors
Safety and surface compatibility are key to a lasting installation, especially when dealing with tough surfaces:
Safety Glasses: Essential to protect your eyes from flying debris or bent nails if a hammer strike slips.
Wall Anchors (Plugs): Standard nail in cable clips drive straight into wood. However, if you are mounting them onto brick, concrete, or tough masonry, you will need small plastic wall plugs. You’ll also need a masonry drill bit and a power drill to create pilot holes for these anchors.
Pro Tip: If you need to manage larger bundles of wires before clipping them down permanently, using specialized tools like a zip tie gun can help tighten your workspace layout efficiently. You can learn how to manage these setups in our guide on how to use a zip tie gun.
Step-by-Step Guide: How to Use Cable Clips with Nails
Installing nail-in cable clips is a straightforward process, but taking the right steps ensures a clean, long-lasting setup that won’t damage your walls or wires. Here is exactly how to use cable clips with nails for a professional finish.
Step 1: Plan the Cable Route and Spacing
Before hammering anything into the wall, map out the exact path your wire will take. Run the cable along the route to check for length and ensure it can reach its destination without being pulled taut.
Keep it straight: Align your route with baseboards, corner joints, or structural lines to keep the installation discreet.
Determine spacing: Space your cable nail clips every 12 to 18 inches (30 to 45 cm) along horizontal runs, and every 8 to 12 inches (20 to 30 cm) for vertical runs to prevent sagging.
Mark the spots: Use a pencil to lightly mark where each clip will go.
Step 2: Prepare the Wall Surface
A clean, clear surface prevents installation slip-ups and ensures the clip sits flush against the wall.
Wipe down the area: Remove dust, dirt, or loose debris from the wall or skirting board.
Check for obstructions: Ensure there are no hidden pipes, electrical wires, or metal plates directly behind your marked spots. If you are dealing with particularly tough surfaces or need to prep a drywall section for heavier loads, understanding how to install plastic wall anchors can help you secure your hardware safely without damaging the underlying structure.
Step 3: Position the Cable and Clip
Proper placement ensures the nail drives straight and the plastic body doesn’t crush the wire.
Pull the cable taut: Hold the cable firmly along your planned path, eliminating any unnecessary slack.
Straddle the wire: Place the nail cable clips over the wire. The curved or flat plastic housing must sit snugly over the insulation.
Hold securely: Grip the plastic body of the clip with your thumb and index finger, keeping the nail pointed perfectly perpendicular to the mounting surface.
Step 4: Hammer the Nail Correctly
The final step requires a steady hand to avoid bending the nail or cracking the clip housing.
Tap lightly: Start with a few gentle taps of the hammer to seat the nail point into the wood or plaster.
Release and strike: Once the nail stands on its own, move your fingers away and drive the nail in with firm, straight hammer strokes.
Flush finish: Stop hammering the moment the head of the nail is flush with the plastic clip. Over-hammering will crack the plastic housing or pinch the cable insulation, which can degrade data or power transmission.
How to Install Nail Cable Clips on Different Wall Types
Different surfaces require different approaches when securing cables. Choosing the right method ensures your nail-in cable clips stay firmly in place without damaging the underlying structure.
Wall Material
Ease of Installation
Recommended Tool / Attachment
Best Practice
Wood & Skirting Boards
Very Easy
Standard Hammer
Drive nail straight; avoid splitting wood
Plasterboard & Drywall
Medium
Wall Anchors / Plugs
Tap gently; use anchors for heavy loads
Brick & Concrete
Hard
Masonry Nails / Hardened Steel
Pre-drill pilot holes with a masonry bit
Installing on Wood and Skirting Boards
Wood and wooden skirting boards are the easiest surfaces for installing cable clips with nails. The material naturally grips the hardware, providing a clean and quick setup.
Positioning: Place the wall cable nail clip over the wire, holding it flush against the wood surface.
Hammering: Tap the nail lightly to start it, then drive it straight in with firm, steady strokes.
Pro-Tip: If you are working with hard old wood, pre-drill a tiny pilot hole to prevent the wood from splitting or the nail from bending.
Installing on Plasterboard and Drywall
Drywall lacks the density of solid wood, meaning standard nail cable clips can easily pull out if they are tugged or subjected to heavy cable weight.
Angle the Nail: When driving the nail into drywall, tilt it slightly downward. This angled penetration uses gravity to help hold the weight of the cable.
Use Anchors for Heavy Runs: For heavy bundle management or long vertical runs, standard nails won’t hold. In these high-stress zones, swap the clip for specialized wall anchors to keep the line taut and secure.
Installing on Brick, Masonry, and Concrete
Hard masonry walls require tough components and specific techniques to ensure your round or flat cable clips do not snap or bend during installation.
Use Hardened Nails: Standard nails will bend instantly against brick or concrete. Always ensure your cable nail clips feature hardened steel masonry nails.
Pre-Drill Pilot Holes: For solid concrete, use a hammer drill with a small masonry bit to create a shallow pilot hole. Insert a small plastic wall plug before tapping the nail in.
Target the Mortar: When working with brick walls, aim the nails into the mortar joints rather than the brick itself. Mortar is softer, making it significantly easier to drive the nail in securely without fracturing the brick face.
Common Applications and Scenario Guides
Securing Ethernet and Coaxial Cables
Managing data lines requires precision to prevent signal loss. Using cable clips with nails keeps your setup clean and high-performing. Ethernet (Cat5e/Cat6): Use 8mm cable clips black or white to match your baseboards. Avoid crushing the jacket to maintain high data speeds. Coaxial (TV/Satellite): Standard 10mm round cable clips fit RG6 coaxial cables perfectly, keeping them tight along walls without crimping.
Indoor vs. Outdoor Installation Guidelines
Environment dictates the type of nail in cable clips you should deploy. Indoor Use: Focus on aesthetics. White cable clips blend seamlessly into drywall and baseboards, while black plastic cable clips hide well behind home theater setups. Outdoor Use: Exposure to UV rays and weather requires rugged materials. Ensure the plastic is UV-stabilized and the nails are stainless steel or galvanized to prevent rust bleeding down your exterior walls. For heavy outdoor bundles, pairing these clips with heavy-duty nylon cable ties helps manage the load before anchoring.
Running Data and Power Cables Separately
Safety and performance should always come first when running multiple lines. Prevent Interference: High-voltage power lines create electromagnetic interference that degrades data signals. Always route internet and coaxial lines at least 6 to 12 inches away from electrical wiring. Dedicated Pathways: Use separate parallel runs of nail cable clips for power and data. Never bunch high-voltage electrical cords and ethernet cables into the same exact clip.
Common Mistakes to Avoid When Installing Nail Clips
Even a straightforward job like installing cable clips with nails can go wrong if you rush through it. Avoiding these common installation blunders protects both your walls and your wiring.
Over-tightening and Kinking the Cables
Hammering the nail in too deep is a recipe for disaster. If the clip crushes the cable jacket, you risk crimping the internal wires, leading to signal loss or short circuits. Leave breathing room: The clip should hold the wire securely, never pinch or deform it. Avoid sharp bends: Forcing a cable around tight corners ruins its structural integrity. For outdoor runs where wires face elements, ensure your backup management tools are equally durable by using weatherproof zip ties for bundled sections.
Incorrect Spacing and Slack Management
Spacing your nail in cable clips too far apart causes the wire to sag, which looks messy and creates snagging hazards. The Sweet Spot: Space clips every 12 to 18 inches along straight runs. Manage the tension: Do not pull the cable completely taut. Leave a tiny amount of slack to accommodate temperature expansion and contraction.
Using the Wrong Clip Size for the Cable
Forcing a thick coaxial cable into a small clip or letting a thin Ethernet cable slide loosely inside a large round cable clip compromises the entire setup. Too small: The plastic wrapper will crack during hammering, or the nail won’t penetrate deep enough into the surface. Too large: The cable slips, sags, and eventually pulls the clip out of the wall. Pro-tip: Always check the millimeter rating on your cable nail clips and match it directly to the outer diameter of your wire.
How to Safely Remove Nail Cable Clips Without Wall Damage
Removing cable clips with nails doesn’t have to ruin your walls or trim. Whether you are rerouting data lines or upgrading your setup, taking out old clips requires a careful approach to keep the mounting surface intact.
Tools for Safe Nail Removal
Using the wrong tool can pry off chunks of plaster or gouge your wood skirting boards. To clean up your old wiring paths safely, gather these essential tools:
Small Claw Hammer: Use the claw to grip the nail head, but always place a small piece of scrap wood or cardboard underneath the hammer head to protect the wall from leverage marks.
Needle-Nose Pliers: Best for gripping loose or bent nails directly and pulling them straight out.
Flathead Screwdriver: A thin flathead can gently pry up the plastic body of the cable nail clips if the nail head is flush against the clip.
Repairing Small Holes in Plaster and Wood
Once the nail in cable clips are removed, you will be left with tiny pinholes. Fixing them quickly restores your walls to a flawless finish:
For Plasterboard and Drywall: Apply a small dab of lightweight drywall joint compound or spackling paste using a putty knife. Smooth it flat, let it dry, and lightly sand it before touching up the paint.
For Wood and Skirting Boards: Fill the holes with a color-matched wood filler or a wax filler stick. Wipe away any excess material with a clean cloth so the repair blends seamlessly with the wood grain.
Frequently Asked Questions
How Far Apart Should Cable Clips Be Spaced?
For a clean install that prevents sagging, space your cable clips with nails every 20 to 30 cm (approx. 8 to 12 inches) along horizontal runs. For vertical routing, you can extend the spacing to about 30 to 40 cm. If you are rounding corners or handling heavier cords, place a nail cable clip closer to the bend to maintain tension and prevent kinking.
Can You Use Nail Cable Clips on Exterior Walls?
Yes, but you need the right material. Standard indoor white cable clips will degrade under UV exposure. For outdoor surfaces like masonry or exterior wood, use UV-stabilized black plastic cable clips paired with weather-resistant hardened steel nails.
What Is the Difference Between a Cable Clamp and a Cable Clip?
While both secure wiring, they serve different structural purposes:
Feature
Nail-In Cable Clips
Cable Clamps
Design
Open hook or loop with an integrated nail
Closed loop that fully wraps the cable, secured by a screw
Best Used For
Quick, low-profile routing of ethernet, coax, or power cables
Heavy-duty, permanent industrial or automotive bundling
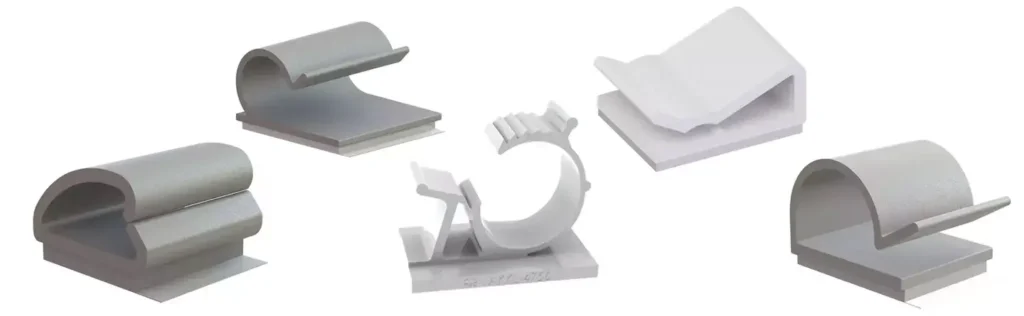
What Are Adhesive Cable Clips? Adhesive cable clips are small, practical devices designed to keep your cables and cords organized and out of sight—without the hassle of drilling holes or wrestling with screws. Each clip features a self-adhesive backing that sticks securely to smooth surfaces like plastic, glass, metal, or painted walls. This means you […]
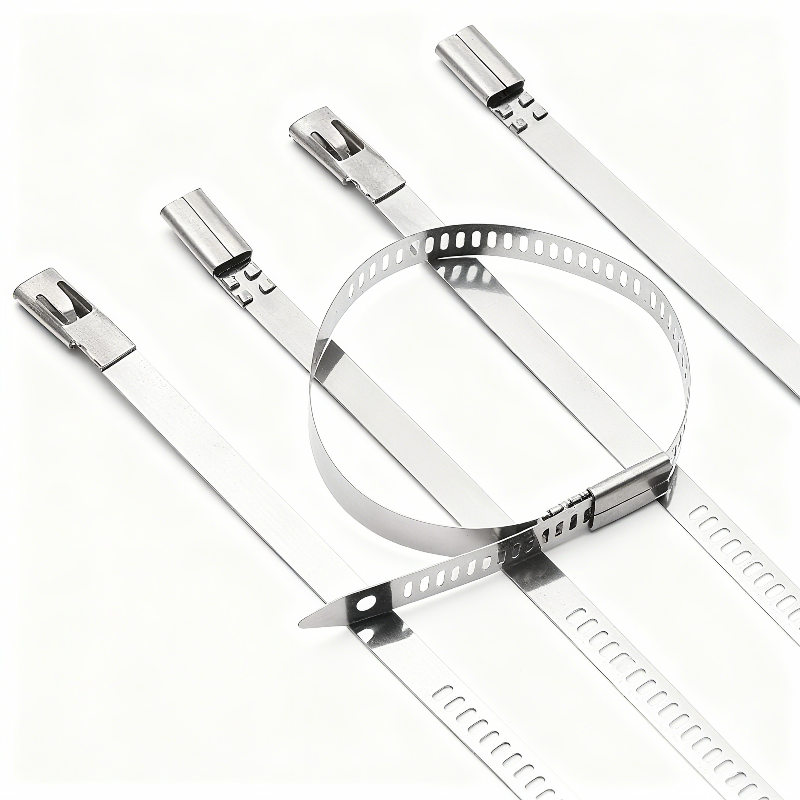
Introduction to Stainless Steel (SS) Cable Ties When industrial projects demand zero-failure fastening, standard nylon simply cannot compete. We engineer premium ss cable ties to deliver permanent, unyielding security for your most critical infrastructure worldwide. What Are SS Cable Ties? SS cable ties—widely recognized as stainless steel zip ties or metal cable ties—are heavy-duty fastening […]
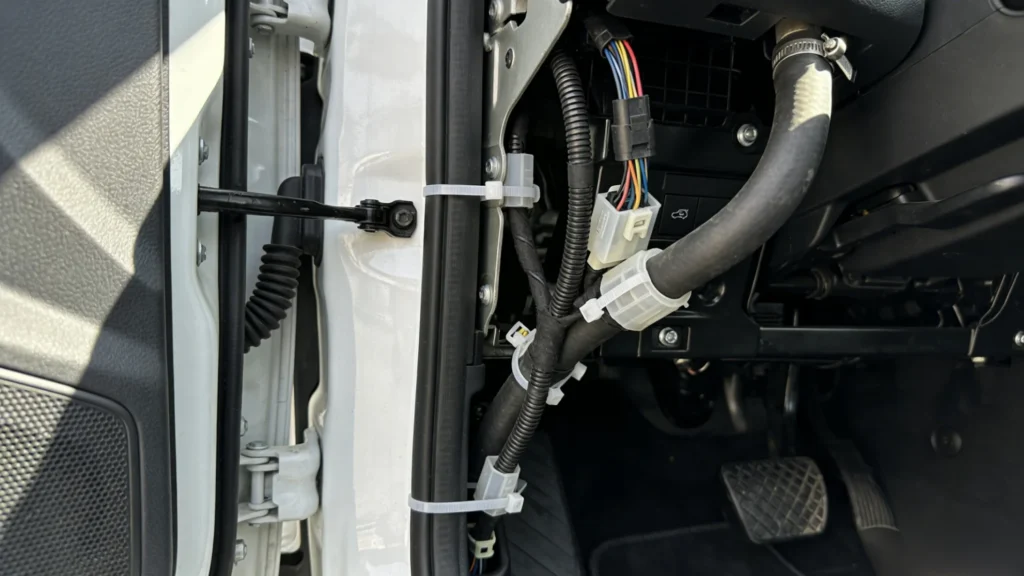
What are Push Mount Zip Ties? Tired of cable tie adhesive bases peeling off in the heat? Or struggling to route wires where screws just won’t fit? We hear this frustration from engineers and OEM designers constantly. When reliability is non-negotiable, you need a mechanical hold. A push mount zip tie is a specialized cable […]
We use cookies to enhance your browsing experience, serve personalised ads or content, and analyse our traffic. By clicking "Accept All", you consent to our use of cookies.
Looking For High Quality Nylon Cable Ties At A Great Price?
Order now to experience cost-effective cable tie products that provide convenience and protection for your work and life.

 EN
EN  AR
AR  ES
ES  PT
PT  FR
FR  RU
RU  DE
DE  KO
KO  JA
JA  IT
IT  NL
NL